Set-up of Expert Advisors in MT4 – Trader’s Tutorial
Have your ever wondered why forex markets sometimes move so aggressively, literally in the blink of an eye when an economic news item is released? How is this possible? The answer is trading robots that are instructed to buy or sell based on the interpretation of a piece of economic information. These trading algorithms are basically computers programmed to buy or sell, and there is a whole industry that deals with programming and managing these computers. While these moves are mostly attributed to big players in the industry, like High-Frequency Trading (HFT) algorithms, the retail trader has the opportunity to build a robot as well and to apply it to a trading account. Before going into more detail, here I will use the MetaTrader 4 trading platform to explain how to set up such a robot; but it is worth mentioning that a trading robot can be programmed to buy or sell on other trading platforms as well. As a matter of fact, if you trade with a trading platform that does not offer the possibility of attaching a robot to a chart, that trading platform is incomplete.
| Broker | Bonus | More |
|---|
What is an Expert Advisor, and How do You Build It?
An Expert Advisor (EA) is a trading robot that can be built using the MetaTrader trading platform and attached to a currency pair to trade it. Such robots are instructed to buy or sell when specific market conditions are met, such as some moving averages crossing, or an oscillator being overbought or oversold, etc.
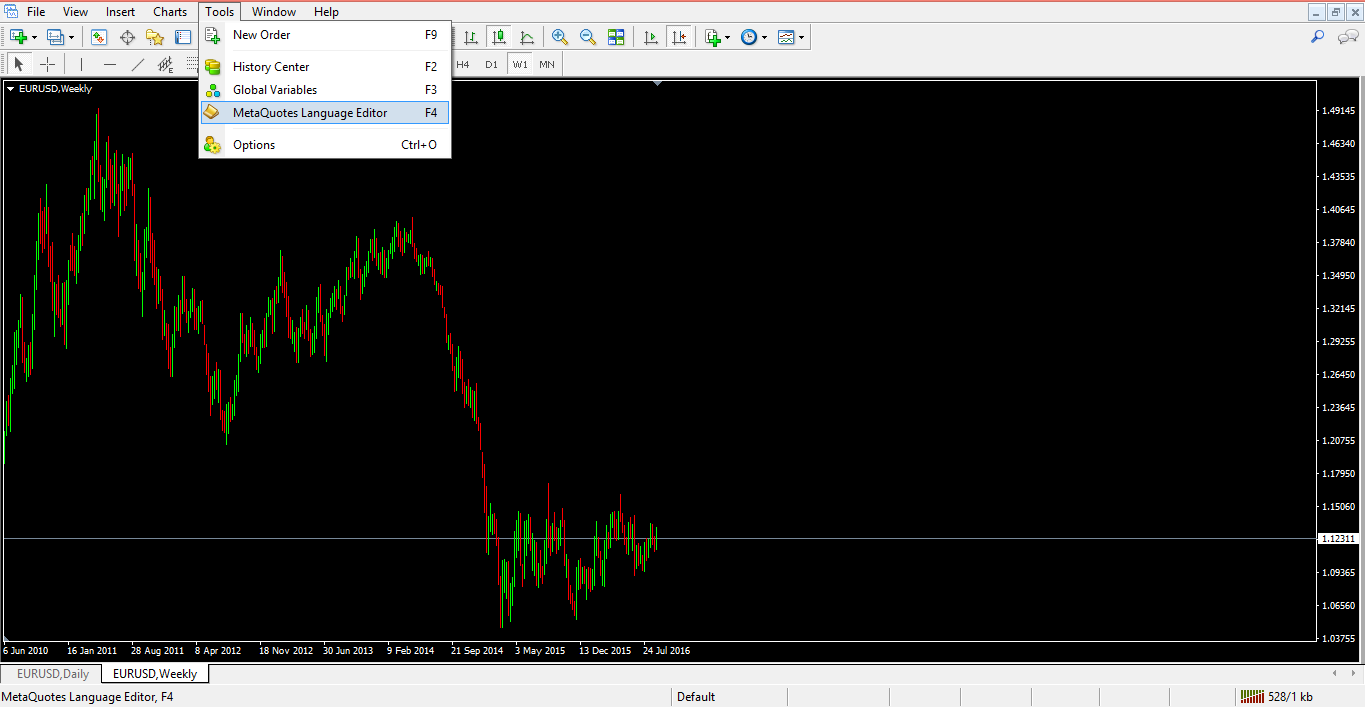
If you know how to program such a robot – i.e., if you’re familiar with the MetaEditor (people with IT programming experience usually find programming in MetaEditor quite an easy task) – then the first thing to do is to open the MetaTrader platform and on the menu above just click on Tools, then choose the MetaQuotes Language Editor, and a new program will open in a separate window.
This is the MetaEditor, and by opening a New Document from the top left, the following pop-up window appears:
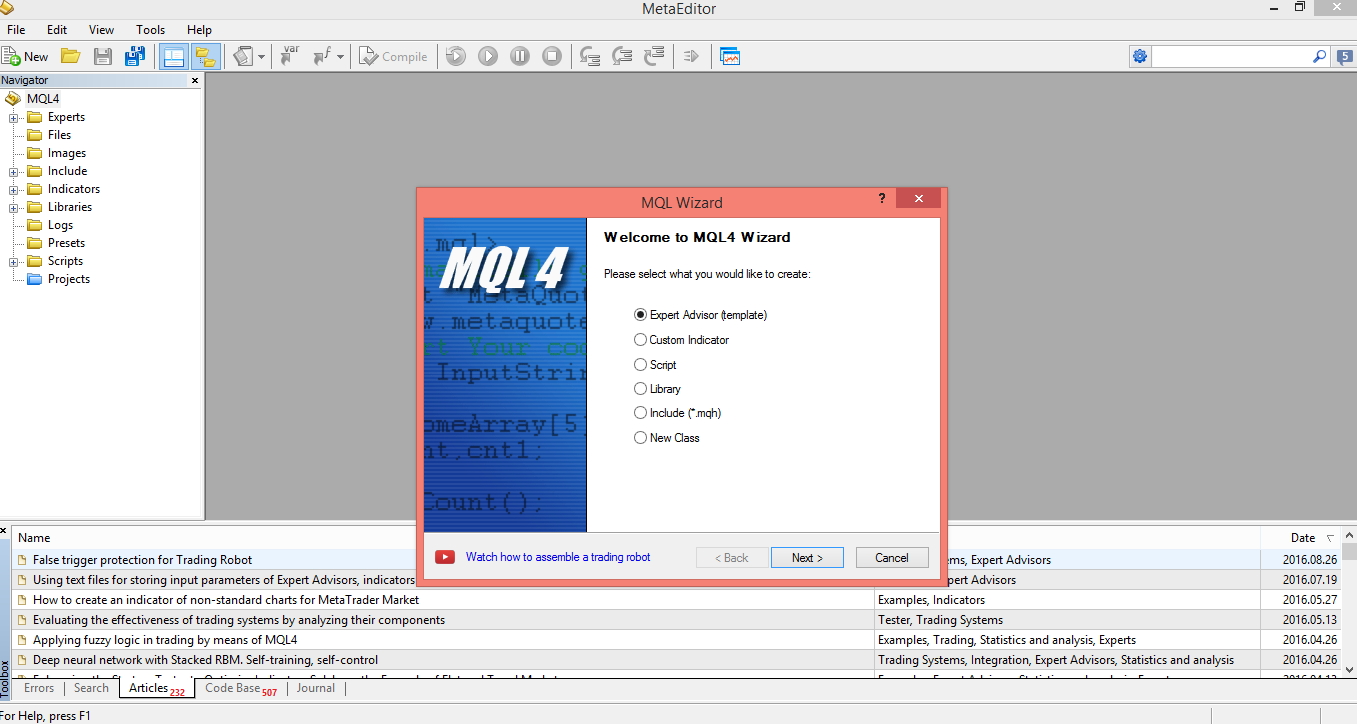
If you choose the Expert Advisor option, the next step is to give a name to it, and off you go – you can start programming your trading robot. However, if you have no idea about how to program it, simply commission someone else to do that. Assuming an Expert Advisor already exists, what is the next step to follow?
Importing an EA to the MetaTrader 4
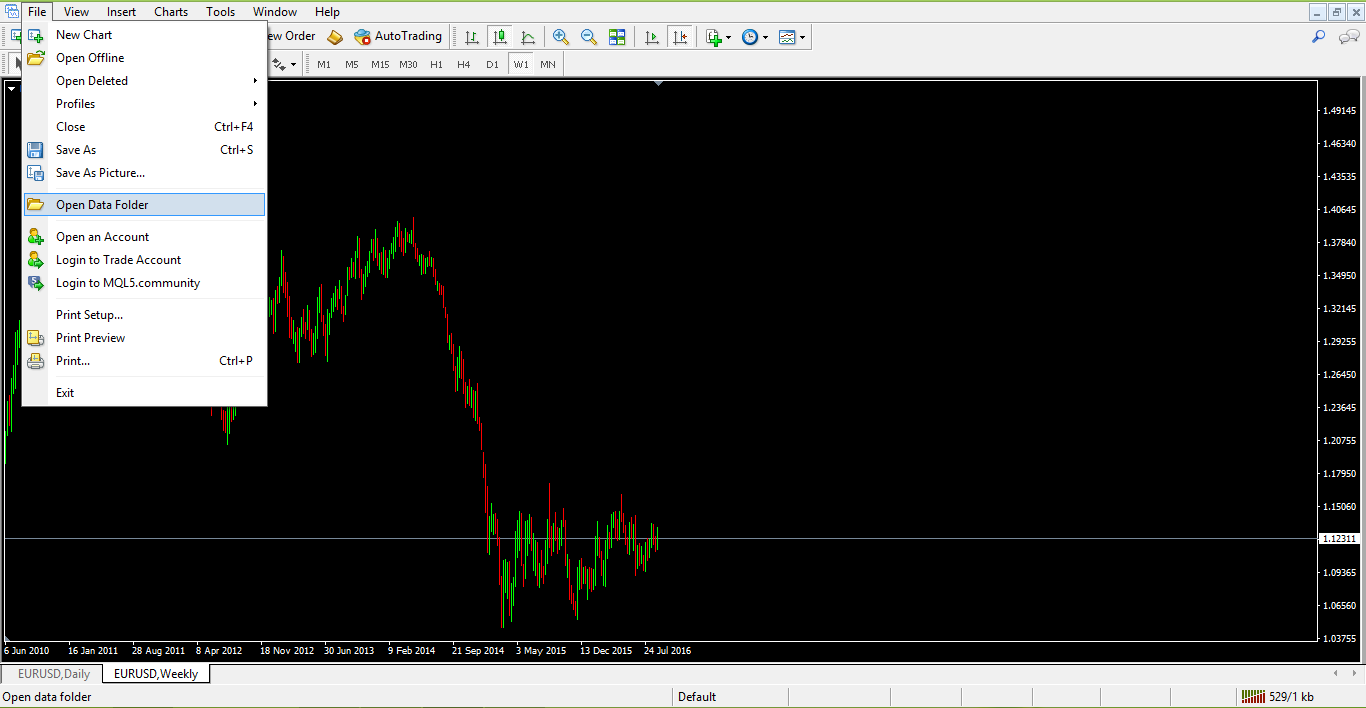
After the EA has been built in error-free mode, the next logical step is to import it to the trading platform, the MetaTrader. To do that, the trading platform needs to be opened, and from the File tab on the top left of the screen the Open Data Folder needs to be selected. That is the location where the MetaTrader is installed on the computer, and next thing is to choose the MQL4, then Experts, and simply paste the Expert Advisor file there. The expert advisor should have the .mql or .exe extension.
Closing the MetaTrader platform at this point is mandatory, otherwise the newly created EA will simply not be found. Therefore, after closing and restarting the platform, simply click on the Navigator tab, then in the newly opened window just select the Expert Advisor tab.
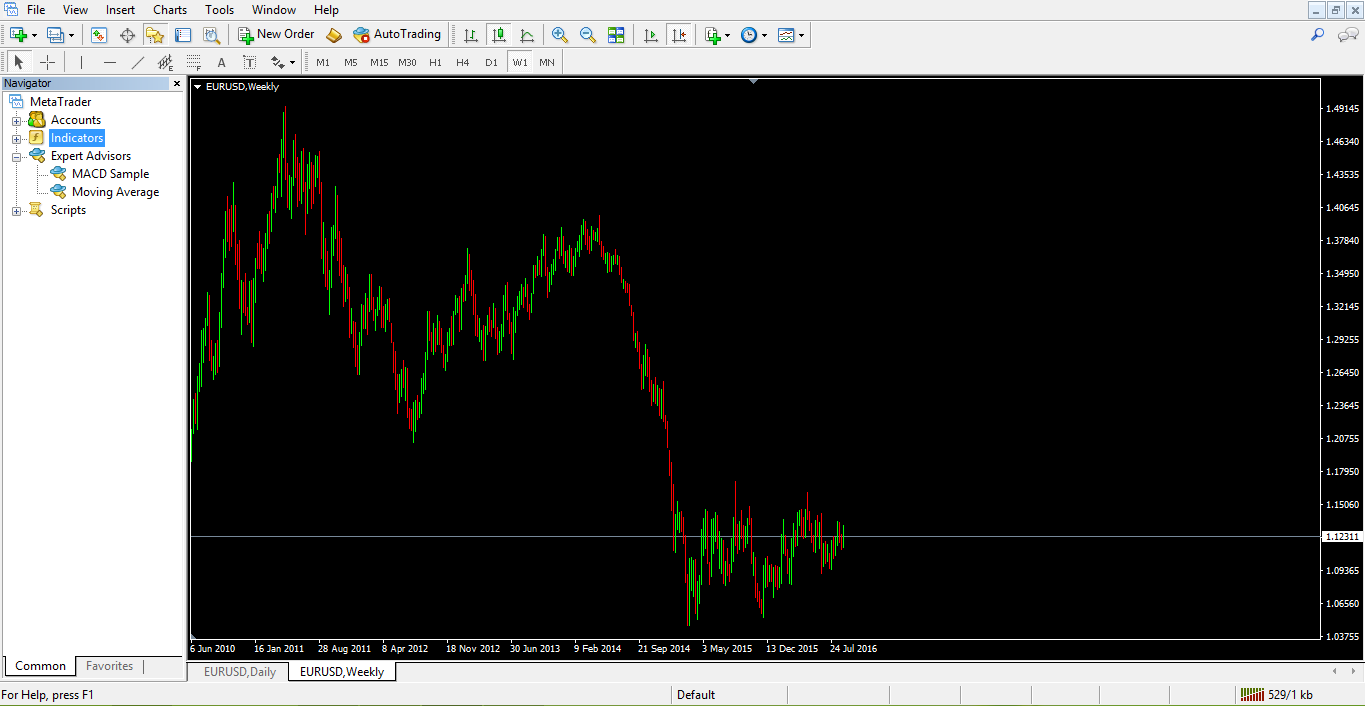
Your EA should be there, and this is how it is imported onto the MetaTrader 4 trading platform.
Historical Testing
At this moment in time, all you know is that you have put a trading idea/set-up into a trading algorithm and are expecting it to function correctly. This may be alright, but how about seeing how it would have performed in the past in order to get an idea of its profitability?
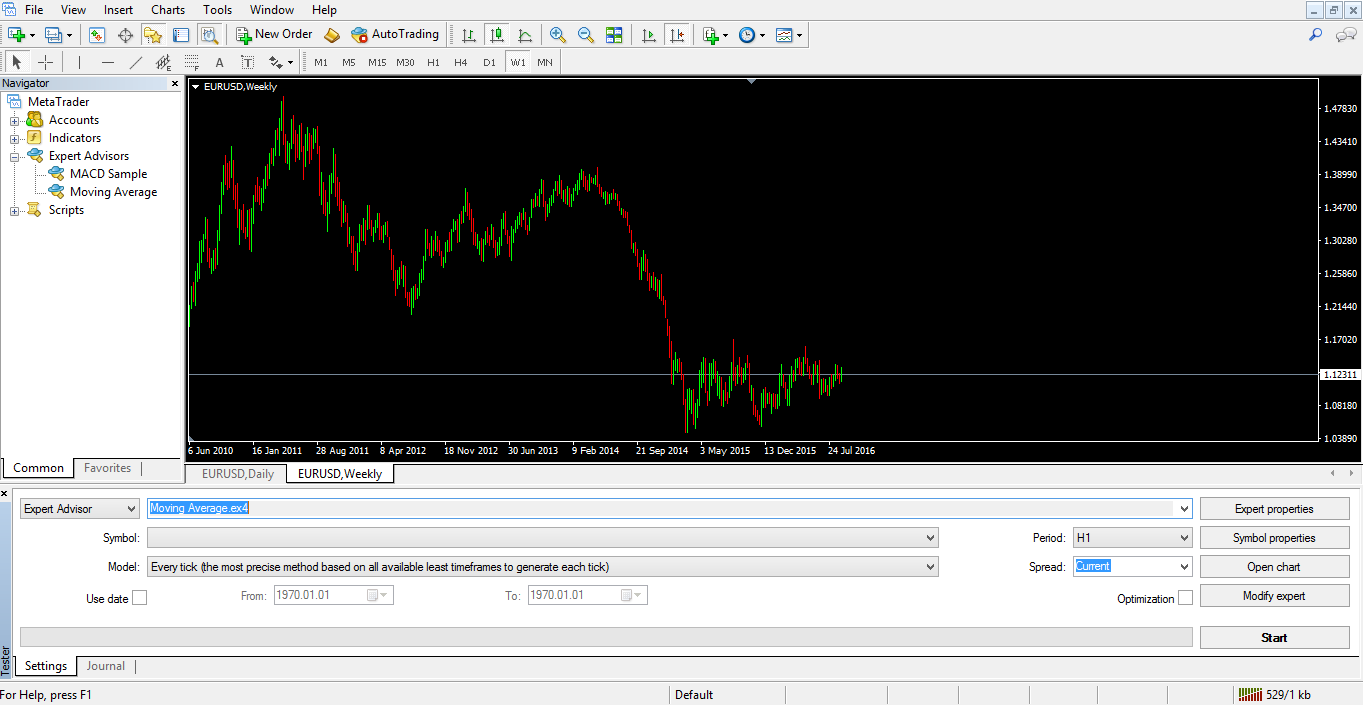
This can be easily done using the MetaTrader 4 trading platform as well. Just choose the Strategy Tester tab, and a new window will appear at the bottom of the screen. This new window allows historical testing, and for this one can select the EA, the currency pair, the timeframe, and the period back in time to be tested.
By clicking the Start button and waiting for the data to be processed, you will get a detailed report compiled by MetaTrader 4 with all the trades taken, date and time of the entry, the outcome, etc. – basically all you need to know regarding how the Expert Advisor has performed.
If the EA turns out to be profitable, then it is time to put it to work!
Attaching the EA to a Chart and Running It
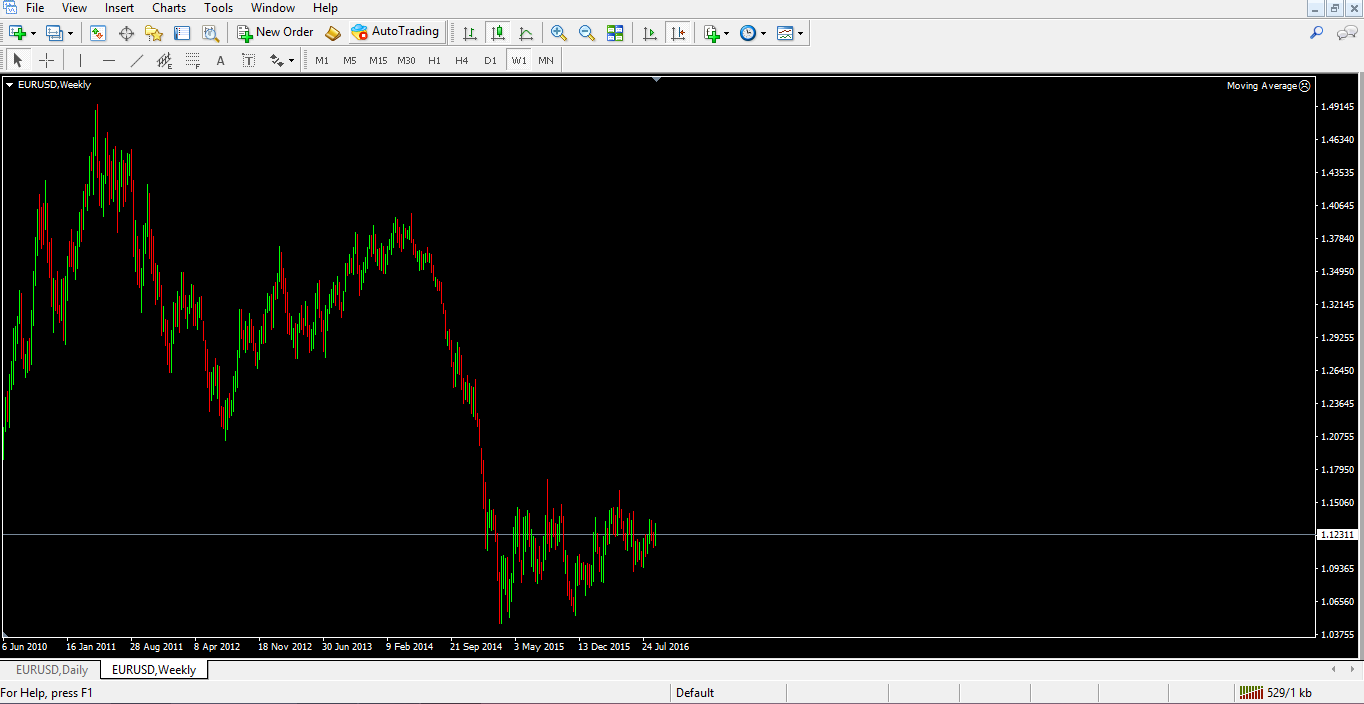
This is a fairly easy task, as all you have to do is to select the Expert Advisor from the Navigator tab as explained earlier, and just click and drag it to the desired chart. The next thing you’ll see on the top right of the chart is an emoticon that shows a face that is upset, as in the image below. This is because the AutoTrading tab is not enabled, and by doing that the emoticon will turn into a smiling face.
If you have a smiling face on your chart, the EA is running and the algorithm will open and close new positions as per the instructions it has been given. There’s one more little thing to consider before deciding whether this is the best and easiest way for you to trade forex markets: If you close the trading platform, the EA will stop working and any open positions will not be closed automatically, nor will new trades be opened automatically. To overcome this problem, there are Virtual Private Servers (VPS) that can be rented from various providers. Some brokers offer free VPS hosting based on the type of trading account one has. The VPS will keep the trading platform open 24/7, and hence the Expert Advisor will trade on a constant basis. There are traders who use multiple Expert Advisors on the same account, the idea being that one EA trades in one direction and another one in a different direction, and so overall the exposure is hedged. This is just another way to use EAs, but normally, if an EA is profitable, then it should be profitable over the long run. Such a thing, unfortunately, is not that easy to accomplish.
Other educational materials
- What is Forex Trading?
- What is a Currency Pair?
- Majors and Crosses – How to Trade Them?
- Leverage and Margin Requirements
- HFT (High-Frequency Trading) in Forex Markets
- Trading Sessions and Their Importance
Recommended further readings
- Expert Advisors – MQL5.com
- “Acquisition and Representation of Knowledge for the FOREX Expert System.” Dorn, Jürgen, and Franz Mitterböck. Proceedings of Computer Science for Environmental Protection98 13 (1998).